Vent Screens Installation Instructions for the Low Rider ST (FXLRST) Fairing
Thanks for your purchase! In a perfect world where money was no object, you’d have your Harley-Davidson® Tech be responsible for the Low Rider ST Vent Screens installation. In the real world however, many of us elect to perform the installation ourselves. Thus Elegant Solutions Inc. dba Motorcycle Vent Screens is obliged to disclaim responsibility for any damage or injuries incurred as a result of your purchase and/or installation efforts.
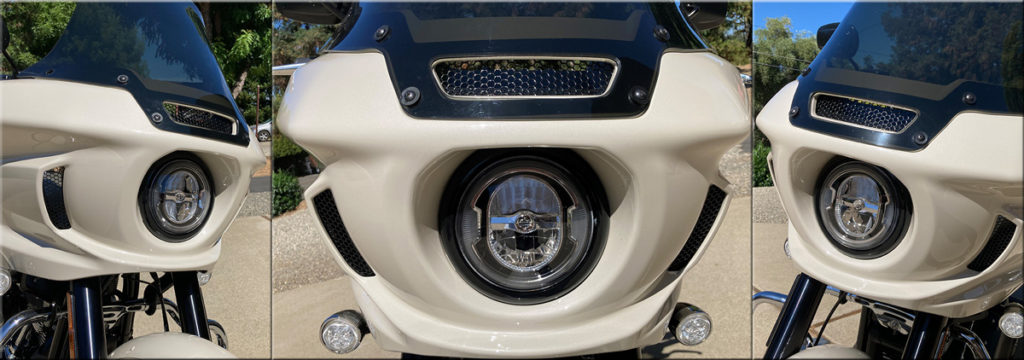
Installation Instructions for the Low Rider ST SPLITSCREENS
- Remove six windshield screws. They are torx 25
- Remove six outer fairing screws. They are torx 27
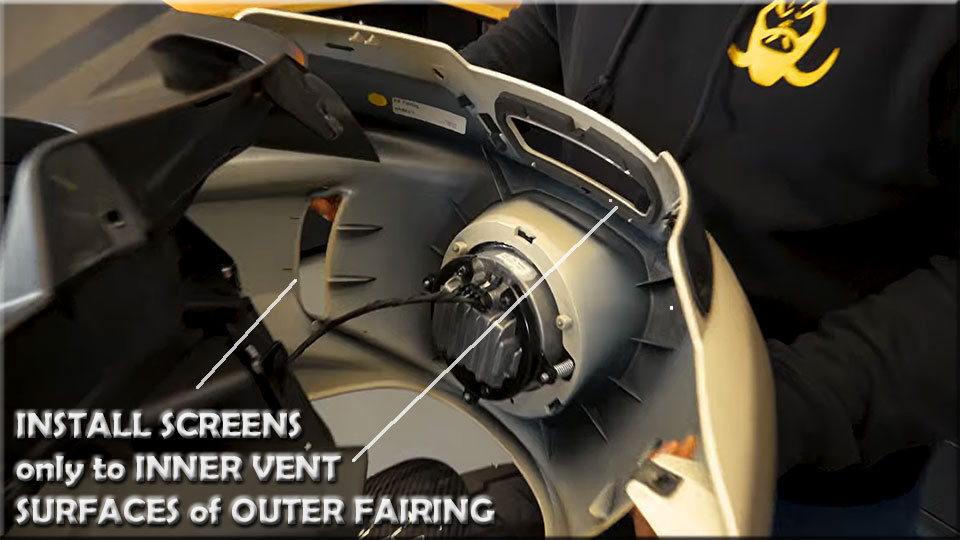
- Slide outer fairing forward, unplug headlight
- Using a protective towel, place outer fairing on work bench for screen installation. Clean the locations where 3M adhesive tape will install (adhere)
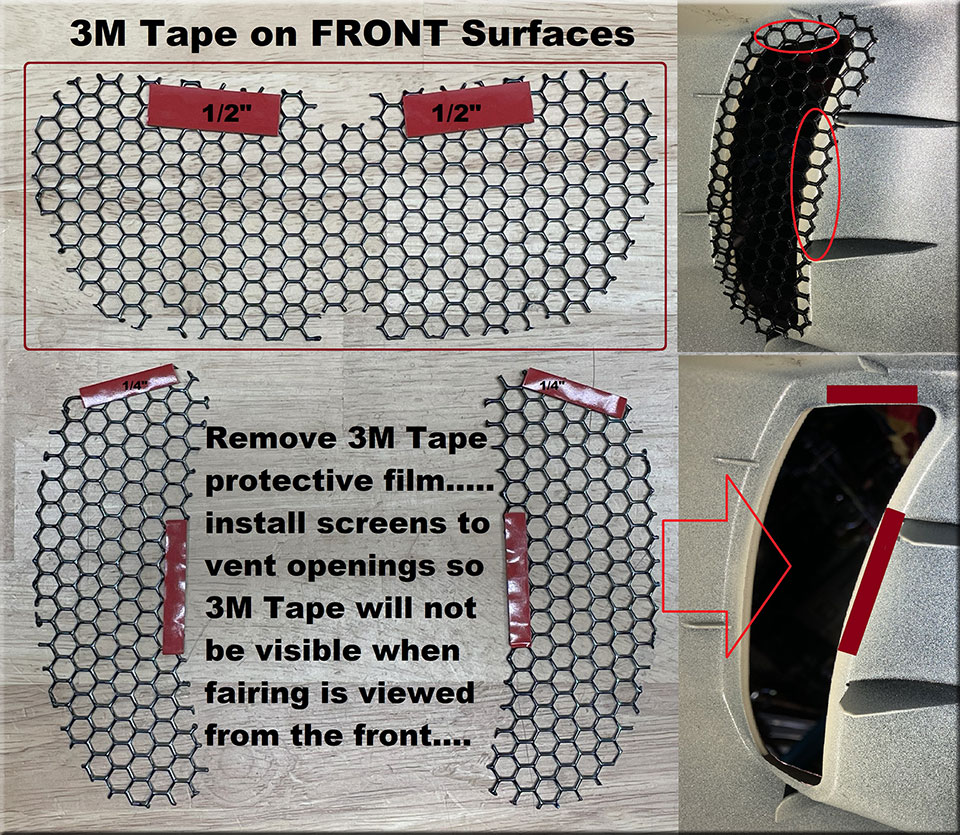
- Beefy 14 gauge screens should be installed with the slightly more rounded honeycomb perforations (3M Tape side=front) facing into the wind
- FXLRST Center Vent Screen: shipped with ½ inch 3M double-sided adhesive tape pre-positioned on the screens’ front surface
- FXLRST Side Vent Screens: shipped with ¼ inch 3M double-sided adhesive tape strips also pre-positioned for installation
- With the 3M tape facing forward (w/protective adhesive-film still in place), “practice place” FXLRST Center Vent Screen in desired position w/vertical honeycomb alignment. Also “practice place” FXLRST Side Screens so that you’re confident 3M Tape will not intrude in the vent opening after installation
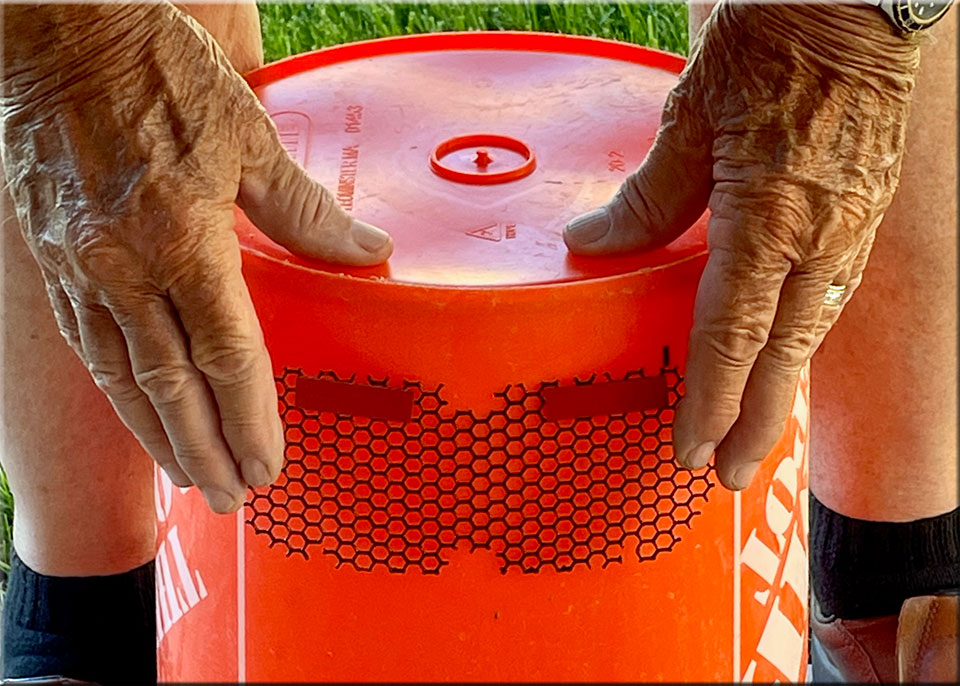
- Note: it’s helpful to carefully and gently apply a slight “pre curve” to the beefy Low Rider ST Center SPLITSCREEN to match the curved fairing vent opening (per photo below, a 5-gallon bucket or similar will do)
- Remove 3M protective film and carefully place the screens in position. Care must be taken during installation to position the screens so that 3M Tape isn’t visible from outside the fairing. Alternately, installer may opt to transfer/reposition 3M tape from side screens to inner surface of fairing vent openings (locations as per photo above) to ensure tape is not visible when outer fairing is re-installed. The sole purpose of 3M tape is to keep screens in position while reinstalling fairing
- Reconnect headlamp
- Re-install outer fairing which “sandwiches” your Low Rider ST SPLITSCREENS in position
- CONTRATULATIONS on a job well done……enjoy your Low Rider ST SPLITSCREENS protection!
- CONTRATULATIONS on a job well done……enjoy your Low Rider ST SPLITSCREENS protection!
Low Rider ST Vent Screens Customer Reviews requested. In order to help fellow FXLRST riders evaluating a purchase, please confirm the high quality of our beefy oven-baked powder coated SPLITSCREENS by leaving a REVIEW of your experience. Thanks in advance!
Elegant Solutions Inc. dba Motorcycle Vent Screens is not affiliated with Harley-Davidson®. Terms such as: Harley-Davidson®, Road Glide®, Batwing, Low Rider ST®, FXLRST® and Harley® are trademarks of the Harley-Davidson® Motor Company. They are only used here for descriptive, informational purposes and displayed either with the ® designation or in CAP’s (an alternate method of displaying the “®” designation). The 3-screen complete solution described herein is termed “Low Rider ST Vent Screens/SPLITSCREENS” and/or FXLRST Vent Screens/SPLITSCREENS. These are terms coined by Elegant Solutions Inc.