Motorcycle Vent Screens Installation Tutorials*
(*GEN-2 Road Glide® Triple SPLITSCREENS product highlighted as our installation tutorial example)
ROAD GLIDE Vent Screens Installation Tips – FXLRST Vent Screens Installation Tips – Batwing Vent Screen Installation Tips
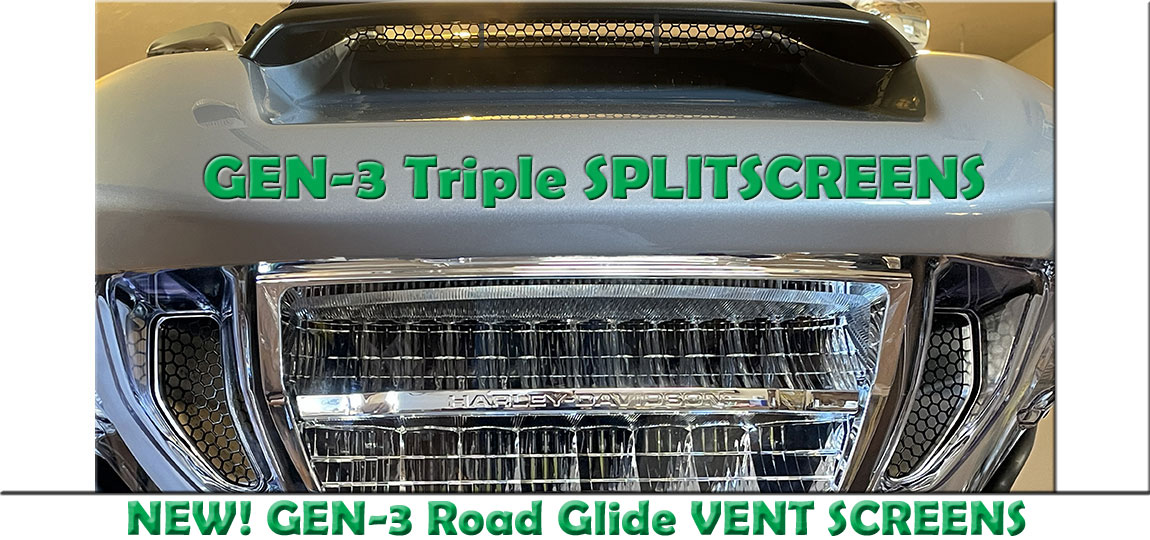
NEW! GENERATION-3 Touring Models:
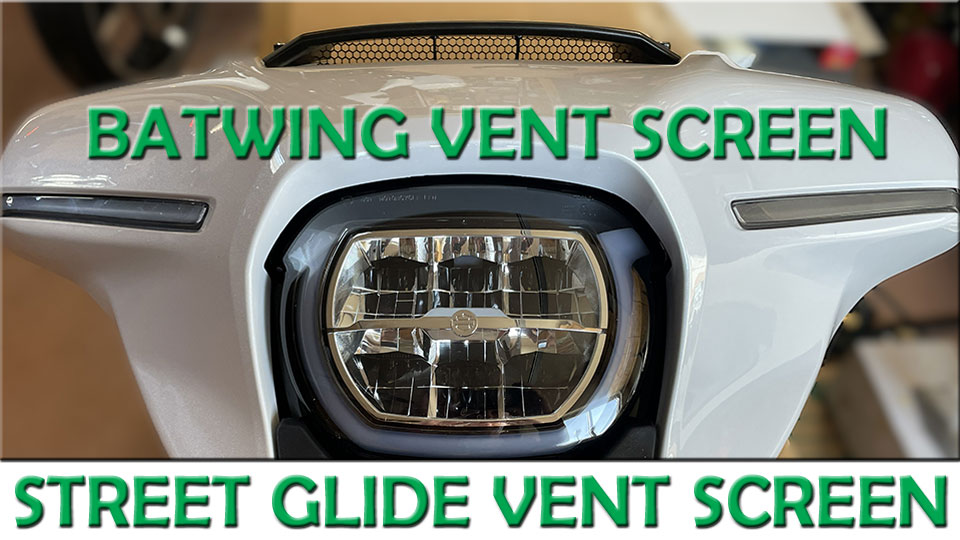
A warm welcome to our fellow “Open Road Brothers”! GEN-3 refers to 23 1/2 CVO’s and 24+ newer touring models with the newest fairing designs. The center (aka upper) vent on both the Road Glide and Street Glide are of similar design offering absolutely no native attachment opportunities for a vent screen. We have accepted this “design challenge” and and are now offering a complete set of RG Triple SPLITSCREENS consisting of the perfect Center SPLITSCREEN along with matching Side SPLITSCREENS. We offer a single BATWING SPLITSCREEN for the smaller Street Glide fairing. This Street Glide Vent Screen is quite similar to the Road Glide Center SPLITSCREEN and installs similarly.
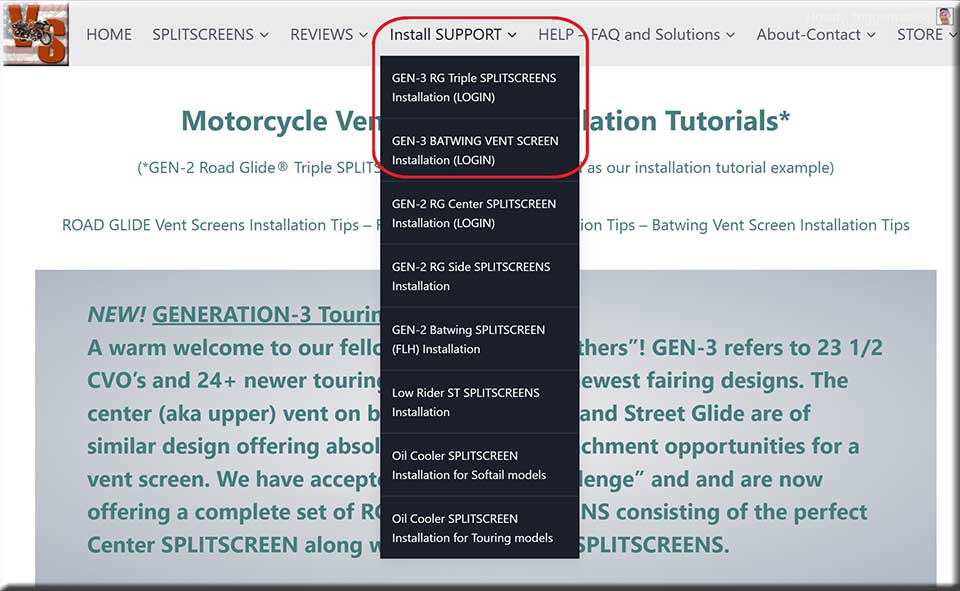
See Main Menu Image below. You are viewing webpage “Install SUPPORT” (menu item #1). Navigate to menu item #2 “GEN-3 RG Triple SPLITSCREENS Installation (LOGIN)” and enter the PASS-PHRASE† you purchased with your package. Proceed with our proprietary installation for a surprisingly easy installation. †PASS-PHRASE periodically changed. Please to not reward “copy-cats” by sharing with others.
HELPFUL TOOLS: Power drill; #2 Phillips bit, drill bit (5/32″~3/16″ range), T-25, T-27, 5/16″ socket/wrench and a plastic body/trim tool to pry (automotive window ice scraper works)
GENERATION-2 Touring Models:
A warm welcome to our fellow “Open Road Brothers”! A “3-STEP” support guide is presented below. While the Road Glide® fairing warrants a look at all “3-STEPS”, FLH (Batwing) and FXLRST (Low Rider ST) SPLITSCREEN(s) installations are so relatively straight-forward that a “STEP #1” support review should suffice. Your Road Glide® Center and Side SPLITSCREEN(S) installation experience however will absolutely benefit by thoroughly understanding / implementing the 3-STEPS listed below (violet text):
STEP #1 – TUTORIAL OVERVIEW Customers are sent an email (check SPAM folder) guiding them to this page. Prior to shipment arrival, familiarize yourself with the installation procedure by accessing our Visual Tutorials via the appropriate “SUPPORT” Drop-Down Menus as described below:
 for information on using the MENU system. Hover your CURSOR over \"SUPPORT\" to reveal DROP-DOWN MENU (items 2-4). Click each menu item to view the appropriate instructional web-page.")
Website Navigation – Motorcycle Vent Screens Top Menu Bar – EACH OF THE 7 MENU HEADERS REPRESENTS A PAGE WITH INFORMATIVE INFORMATION
Pre-Order QUESTIONS for the GEN-2 RG Center SPLITSCREEN? A PASSWORD is Not Required to watch an “overview” version of the installation video. To view, click: SYNOPSIS
GEN-2 ROAD GLIDE Customers: reading and understanding the information contained in the three SUPPORT pages (SUPPORT; Center SPLITSCREEN; Side SPLITSCREENS) should result in an easy installation. Please contact us with any questions and/or concerns!
GEN-2 ROAD GLIDE Vent Screens Installation
STEP #2 – WHAT TO EXPECT Before opening your package, familiarize yourself with what to expect, i.e., the contents of your shipment which are detailed in the enclosed Packing Slip as well as below. Our packaging system is designed for “foolproof” completeness*! If all listed items are not evident, check the trash. The person who unpackaged the stiff cardboard shipping envelope most likely inadvertently discarded any “missing” item(s). Also take care to avoid accidently detaching the neoprene rubber Stabilizer Pad from its installation template:
*UNPACKAGING: (a GEN-2 Road Glide Triple SPLITSCREENS order is depicted): Your order will arrive in a humble 11.5″ x 9″ stiff cardboard mailing envelope containing the following 8 (eight) numbered items:

- a neoprene rubber edge-trimmed (#1) Center SPLITSCREEN with (#2) Mini-Binder Spring Clip shipped within a (#3) protective cardboard sleeve which is attached to the (#4) Stabilizer Pad Installation Template with a pair of small paper clips (not shown). See Important Handling Note**below.
- a (#5) Neoprene Rubber Stabilizer Pad “hosted” by the (#4) cardboard Stabilizer Pad Installation Template and a large (opened) paperclip (#6) “tool”. This “tool” (a convenience item) is inserted into the drain slot during installation in order to position the bottom edge of the Center SPLITSCREEN for clamping.
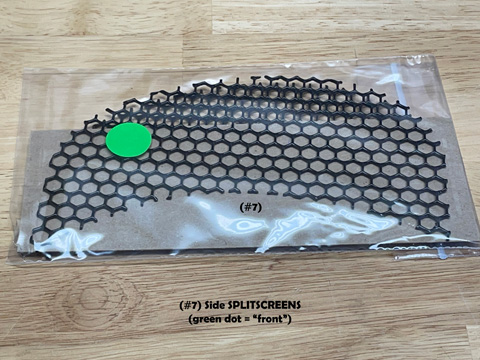
- a pair of (#7) Side SPLITSCREENS shipped within a protective clear plastic bag. The mVS badge (or green sticker) signifies “front“.
- (#8) a set of 4 #6 x 3/8″ Pan Head screws to maintain the integrity of the 2-panel Air Duct Assembly (ADA) and avoid separation issues.
- **IMPORTANT HANDLING NOTE: Please take care handling† the 5″x 6″ cardboard template which is used to position the Stabilizer Pad midway within the center vent (aka Air Duct Assembly or ADA). † Handling: while removing template from shipping envelope (or removing protective film to expose adhesive), take care to not inadvertently detach the neoprene Stabilizer Pad which is designed to easily detach from the cardboard template;

- a Mini-Binder Spring Clip is attached to Center SPLITSCREEN inside the protective sleeve; do not discard thinking it’s only an “office-supplies” paper clip.
- a packing slip, sales tax information and overview installation instructions.
- Note: during powder-coating, each screen is hung by a wire hook for spray coating followed by oven baking. It is normal to see an occasional small “bare spot” where the wire hooks were placed (strategically hidden from view when installed).

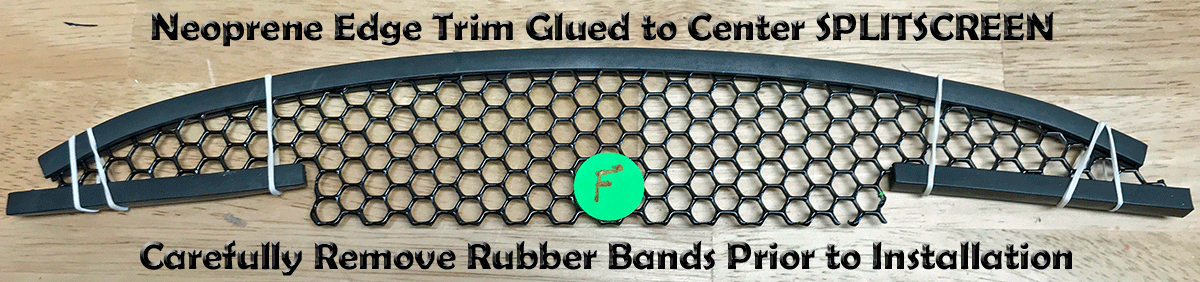
Please remove any rubber bands temporarily securing the freshly glued*** neoprene rubber trim to the Center SPLITSCREEN. ***a “convenience solution” to insure the (friction-fit) neoprene trim remained properly installed on the screen edge during shipping.
This is what to expect upon opening your Triple SPLITSCREENS shipping package
STEP #3 – ACCOMPLISHMENT Overview complete. When ready to begin the installation, we recommend you watch the video tutorial again. Afterwards, prepare your workspace and let’s get this installation done!
Shark CUSTOMERS: have your password handy, then CLICK HERE when ready to proceed with the installation. Password provided inside your package; also provided with your order acknowledgement email.
(NOTE: eBay customers wanting to review Center SPLITSCREEN installation instructions prior to receiving their package, please contact us directly)
Low Rider ST CUSTOMERS: please CLICK HERE when ready to proceed with the installation
(No password required for your almost embarrassingly easy installation)
Batwing CUSTOMERS: please CLICK HERE when ready to proceed with the installation
(No password required for your almost embarrassingly easy installation)
DISCLAIMER: Thanks for your purchase! In a perfect world where money was no object, you’d have your Harley-Davidson® Tech be responsible for the installation. In the real world however, many of us elect to perform the installation ourselves. Thus Elegant Solutions Inc. dba Motorcycle Vent Screens is obliged to disclaim any responsibility for any damage or injuries incurred as a result of your purchase and/or installation efforts. Always protect yourself with the proper safety equipment and protect your motorcycle with appropriate padding such as a folded towel covering the front fender, etc. Congratulations on your wise purchase and have a fun installation!
ROAD GLIDE Vent Screens Installation
Note: Our Side SPLITSCREENS (right screen) began shipping with the new “mVS Badge” 11/21/2017. In response to customer feedback, we’ve since made this classy clear epoxy protected mVS Badge optional as it’s glued in place and some of our customers prefer the plain “no distractions” look! If you’re willing to display our Symbol of Quality, it’s yours at no additional charge (our cost for this beautiful badge is $4)
ROAD GLIDE Vent Screens Installation
Complete Customer Satisfaction Matters!
Our Support Pages are intended to assist those who’ve purchased our products and who therefore deserve guidance with the installation. At the very fair Made in USA pricing our volume production allows, many DIY’ers may discover they’d be better served taking advantage of our hard-earned expertise. The irregular shape of the Rushmore ROAD GLIDE Air Duct Assembly proved to be quite challenging for the secure installation of a center vent screen, particularly one which didn’t interfere with the center vent flap closure! We’re dealing with a “funnel shaped” passageway which offers few (if any) obvious points for firm attachment of the screen, and it took a considerable amount of research and “trial and error” to produce a secure solution! Perhaps this explains why there are few (if any) reliable center vent screen solutions commercially available!
Why the PASSWORD? The unique attachment method we’ve developed which secures our Center SPLITSCREEN (both top and bottom) is proprietary and therefore, in fairness, offered only to those already “riding with us”. Accordingly, each Buyer receives a post-purchase email providing a PASSWORD for access to our Center SPLITSCREEN (LOGIN) page where the attachment method is fully documented. Along with the option to contact us directly, this valuable information provides our CUSTOMERS the support to which they’re entitled!
Pre-Order QUESTIONS? A PASSWORD is Not Required to watch an “overview” version of the installation video. To view, click: SYNOPSIS
A message from the President of Elegant Solutions Inc. dba Motorcycle Vent Screens: My very first “Touring Bike” was a Batwing FLHTK Ultra Limited and I loved riding it. However the Harley-Davidson® Road Glide® became my favorite touring motorcycle the first time I rode one! The “Shark Nose” frame-mounted fairing offers both high speed stability cutting through the air at touring speeds as well as low speed maneuverability with the handlebars “free” of the weight of the fairing. My BSR (back seat rider) wife is extraordinarily comfortable riding with me and considers this bike to be a “limo on 2 wheels”! Elegant Solutions Inc. dba Motorcycle Vent Screens is not affiliated with Harley-Davidson®. Terms such as: Harley-Davidson®, Road Glide® and Harley® are trademarks of the Harley-Davidson® Motor Company. They are only used here for descriptive, informational purposes and displayed either with the ® designation or in CAP’s (an alternate method of displaying the “®” designation). The 3-screen complete solution described herein is termed “Triple SPLITSCREENS”. “SPLITSCREEN(S)” and “Triple SPLITSCREENS” are terms coined by Elegant Solutions Inc.